Wednesday, March 28, 2012

Big Kahuna Burger


Aloha hungry friends! We'd like to note that our Big Kahuna Burger blog is a special edition for the blog since they were made with products from Kaua'i, Hawaii!


Danny and I decided to make Hawaiian burgers while we enjoyed our vacation in beautiful Kaua'i and we made exquisite Kahuna Burgers that were definitely Big! You don't have to be in Hawaii, just wear a hibiscus flower on your hair and prepare yourself to make sweet and most definitely filling burgers! 

Time: approximately 1 hour
makes 8 burgers

Here's what you need:
3 lbs beef
1 orange
1/2 cantaloupe
1/2 pineapple
8 slices of cheddar cheese
8 hamburger buns 
Hawaiian Teriyaki sauce (measurements to your liking)

Let's get started! Start out with the pineapple because it is definitely difficult to peel with a knife and cut through. It takes a lot of muscle so be prepared! We cut over 8 half inch thick slices to have extras in case someone wanted an extra pineapple in their burger. 


Beef time! Start out by forming your patties to your preferred size. We naturally like to keep our patties "beefed up" so ours turned out thick! As they start to cook to your liking, start spreading the Hawaiian teriyaki sauce on the patties. Next, place the cheddar cheese so it slightly melts.


Throw the burger buns on the grill to warm them up and so it gives them a light, crisp, crunch texture to the edges and keeps the inside soft. 


Now it's time to fry the pineapple slices. We spread the Hawaiian teriyaki sauce on the pineapple slices to fry them easier and so it absorbs the sauce sweetly! After those are done frying, add more sauce so that it adds more flavor to the pineapple slices!


Now you can start stacking the Big Kahuna burger! Bottom bun, then fried pineapple slice, patty with cheese, and add a little more teriyaki sauce to add more flavor, then of course the top burger bun!


We added cantaloupe squares and orange slices for sides as well as some crispy fries (optional...well not really, you really should have EVERY burger with fries)!


That's it! You're all done and just made some legit burgers that'll make everyone hungry for more! After you're all done eating you'll be dancing like these two! Mahalo for reading our blog! 


Sunday, February 19, 2012

Little Westies


These sliders are not your typical sliders that serve as an appetizer. These little monstrous-looking cowboys fill you up, surprisingly! We suggest you have them for lunch or dinner (unless you're having that kind of day where your stomach controls you and tells you that you must have juicy sliders before your big dinner. Tends to be after work or school for most of us). Warning: They are irresistible! Enough with the hunger pains let's get cooking! Here's what you"ll need: 

Time: about 45 minutes
(makes 8 sliders--serves 3-4 people)


Ingredients: 

8 small slices of cheddar cheese
8 bread rolls (we used Hawaiian rolls)
5 bacon strips
1 lb of beef
BBQ sauce (Your favorite! We used "Mo's Smokehouse BBQ sauce")

Begin with the patties! Since they're sliders the meat shouldn't be too beefy. Danny likes to "beef up" the patties so if you want them thick, form your ground beef with a diameter of about 2 inches. 


Before you throw these on the BBQ grill, you can start cooking the bacon so it's nice and ready by the time your patties are all finished. Be careful with the bacon because it sizzles and the crackling on the skillet can burn your hands as you flip them over! Make sure you don't eat any of the bacon like a sneaky cook! Warning: your entire house will smell like breakfast time! Sizzling bacon has too many warnings so instead we'll make your stomach growl and show you these mouth-watering photos: 


When your juicy bacon is all done, you can go ahead and start grilling your patties! Have your cheese and rolls ready also!

Next, when you see that your patties are nearly cooked, you can place the cheese on the patty and let it sit until it melts a bit but not entirely!


Look how irresistible they are looking already!


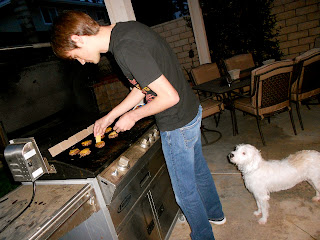
We warned you about how irresistible these little sliders are. Even Boo the cute puppy was giving us sad puppy faces to "help" out in the kitchen: 


After you have your patties all finished you can start toasting the buns on the BBQ grill.


Finally, when your rolls are all done, you can start putting them together and add your favorite BBQ sauce on the bottom roll so the juicy meat soaks up BBQ! Here's the Little Westy Cowboy formula:
1. bottom bun 
2. BBQ sauce 
3. patty with cheese on top 
4. small bacon strips 
5. top bun

So there you are! You just made your very own "Little Westies" so go enjoy them!
Appreciate delicious creations like this and listen to this song that expresses our love for burgers & food!


Sunday, January 29, 2012

Guacamole Recipe

Not only is guacamole addicting, it's very beneficial to know how to make because it can be used in several ways! You can use it as a dip for your chips and salsa if you have friends or family over for get-togethers for instance. (REMINDER: Super Bowl Sunday coming up! This would be perfect to bring to your SB party!)  Guacamole may also be used in your burrito, tacos, carne asada, pollo asado....see you're already getting hungry! If you don't really eat fruits and veggies or anything green, like Danny, I'm positive you'll love this! This is one of the only few green things that Danny eats so that says enough! So check out this simple recipe to make plain, spicy guacamole!

(makes a medium bowl for small party) 
Ingredients:

4 avocados
*1 & 1/2 chile serrano (green)
1/4 batch of cilantro
1/2 lime
3 solid shakes of salt

(You may also add half a small rome tomato or sprinkle onion bits to add more flavor, however, Danny and I are not fans of either so we kept it simply green.)

*NOTE: if you don't like it to be too spicy, we recommend you use a single chile or half for a mild spicy taste. If you like it extra spicy, use 2 chiles. Our recipe is an average spicy for those who can handle spicy foods!


Start out by cutting the avocados in half so you can scoop out the goods inside with a spoon. Don't throw out the seed!!! Keep all the seeds! You'll be using these towards the end! Now, when you have scooped the avocados out, slice them horizontally and vertically so that it's easier to mash them when you begin mashing the avocados. 


Next step you add the chile serrano! Slice them into thin rings and then cut those rings vertically and horizontally so you have small bits of the chile. The reason why you should keep the chile bits smaller is to prevent from biting a big chunk of the chile because it can be surprisingly spicy! 


After you add the chile you can start mashing the avocados in your bowl using a spoon. Use the bottom of the spoon to mash it down as Danny does in this photo: 

Sprinkle in the chile serrano and mix it around the bowl to spread it around evenly in your guacamole! After you add the chile in your guacamole, you can start cutting the cilantro to add small leaves in your guacamole. Careful while cutting!

Following that, you can add the lime in! We personally love our guacamole with a citrus kick so we use 1/2 a lime. However, if you don't want to add too much, give the lime a few squeezes as you prefer. Gently mix the lime juice evenly.

Last step, you bring back those big avocado seeds and add them inside your guacamole. The secret to those seeds is that they keep your guacamole green for a longer period of time. It helps to keep them fresh! This is an old Mexican cooking tip that really works! We added 3 seeds in our guacamole. Sprinkle 3 shakes of salt around to add the last flavor!


You're all done now! Go grab a bag of tortilla chips and taste your spicy guacamole! Everyone will love this guacamole and you'll be the talk of the party! Even Boo the cutie puppy couldn't help begging for some delicious guacamole!


*These photos were so green we couldn't help to think about Belle & Sebastian's song "Funny Little Frog" so here you go, listen to it and enjoy your guacamole with a lovely song! Cheers!


Monday, January 16, 2012

Peanut Butter Cookies

One of the most depressing things about baking is when you find out you didn't "nail it." It's funny but it still makes you feel like you just want to give up and go back to heating up Pillsbury Cinnamon Rolls in the oven. But don't give up just yet! Danny and I are sharing a recipe to make PEANUT BUTTER COOKIES that are simply fast and easy to make! Whether you are a master in the kitchen or a beginner, everyone should try to make these cookies because...wait you don't even need a reason why...peanut butter cookies are made with peanut butter, enough said. So with that said, go get your apron and change into sweatpants because after these treats are made, you're going to want to lay on the couch all night and munch on these while you watch reruns on Top Gear (BBC knows how to make a good couch potato out of viewers, like myself and Danny...who's ashamed? We're not.)

Recipe:
1/2 cup shortening (crisco)
1/2 cup peanut butter
1/2 cup sugar
1/2 cup brown sugar
1 egg
1/2 tsp baking soda
1/4 tsp salt
1 & 1/4 cup flour

1. Preheat your oven to 375 degrees Fahrenheit 

2.Start by adding the ingredients in a large bowl, excluding the flour. (Danny and I use a Kitchen Aid Mixer because it saves more time and energy, so we use the 5 quart stainless steel bowl, but any bowl approximately 5 quarts will work). Mix on a low speed to begin the mixing!


*When you have mixed the ingredients, add the flour last

3. After you have mixed your dough, make sure you don't see clumps of sugar or flour that weren't mixed thoroughly! You don't want to bite into a cloud of flour so to prevent this, change the speed and finish the mixing on a medium speed.


4. Now we go on to forming cookies! Ok, so typically, you want to shape spheres that are smaller than a golf ball...think 3/4 of a golf ball size. Sometimes, if you don't watch yourself, you may end up "beefing up" the sphere and the cookies may end up looking like a pancake's cousin!


5. Fancy cookies time! After you roll up the sphere, take a fork and push it down once horizantal, and a second time vertical to create a flat cookie with a charming design! Space them out evenly so they have enough room to spread!


6. These charming cookies should hang out in the oven for about 10 minutes, but keep an eye on them! 

7. As soon as they start to get a golden color you'll know that they are ready to take them out! Be careful because they're HOT!!!
Lay them out on a napkin so they can cool off for about 5 minutes (REMINDER: sometimes they come out really tender and seem raw, but they're not! They just need to cool off on the pan before you lay them out on the napkin!)


Now go watch Snatch with these Golden Brown Peanut Butter Cookies :) Enjoy! 


Delicioux Oui by Danny & Heidi 

Thursday, January 12, 2012

Hello everyone!

This blog was created by Danny Forgette and Heidi Moreno to display our delicious food recipes on the worldwide web for all you readers! We will walk you through these easy recipes, step by step, so that you are able to create delightful, appetizing foods that we suggest you try!

The easy recipes are good for those occasions when you realize, "Holy canoli!I have to bring appetizers to the event!" We have recipes to distress these catastrophic moments! Simple recipes are also a good way to learn to bake/cook for beginners that have become aware of the stove,oven or barbecue and have let go of their microwave! "Goodbye Hot Pockets! I will miss you dearly!" (sidenote: how can anyone say bye to Hot Pockets?? They're too good!But there are so many more homemade foods that'll make your tummy happier. So read on!) Additionally, the unchallenging recipes are a terrific way to just relax and bake/cook something just for kicks.

If you're looking for exquisite dinner ideas or planning to impress your date, we will help you find the right recipe to dazzle them! The recipes that require more work will have detail and some helpful tips to help you get through process. If you are a visual learner, we will present the difficult recipes with more photos to aid you and answer your questions. Photos are a great way to demonstrate the process and not to mention to see the result and see how you "nailed it!"

In addition to the recipes, this blog will also dedicate some blogs to every cook searching for tips in the kitchen. Sometimes, it's those weird tricks that really add a "kick" to the unforgettable dish! Make sure you keep a notebook with you to write these down for future use.

We are sincerely looking forward to help you in your future cooking/baking endeavors! Stay tuned for more! If you have any questions feel free to email our blog and we will get back to you soon! Submit your recipe questions or comments